Gnomes for the Holiday – Scrap’N Stamp Blog Hop

Here we are back for another blog hop with Scrap’N Stamp! This month we have Gnomes for the Holiday! Who doesn’t love gnomes? These adorable creatures aren’t just for your lawn anymore! In fact, I have one on my front step made by a dear friend of mine that I dress up for each season!

As always there is a $50 Scrap’N Stamp gift certificate up for grabs! All you have to do is hop to each participant’s blog, like and comment to enter! We really do appreciate your comments and I can honestly say I read each and every one of them! It’s also a great way for us to know if you like the content we are putting out there for you!

Well, let’s get started in adding gnomes to our holiday greetings! If you prefer to watch the video rather than read the blog, click HERE.

If you haven’t already, please subscribe to my channel and hit that like button. Each time someone comments or likes my videos I get an incredible warm and fuzzy feeling that lasts for days! I appreciate every single one of you!! But enough babbling……

I am using the stamp/stencil/die set from Craft Consortium called Natures Garden – Gnome Girl. I like that this set has the three different items in it to help you create various looks. I stamped the image using Memento Tuxedo Black ink and did some quick and easy Copic colouring. To add an extra layer of interest to the gnome I used the coordinating stencil and Brilliance Moonlight White and inked on the little hearts with a finger dauber and then die cut the image out with the coordinating dies. I must admit I did have a few issues with the stencil lining up perfectly, but in the end I still think the image came out okay.

For the card base I started with a red standard A2 size card and then cut the from down to 2 1/8″. I then used the MFT stax rectangle dies to cut out two larger rectangles (one from white cardstock and the other from double sided pattern paper from Doodlebug) and one white cardstock piece from a slightly smaller rectangle die. You can use any shaped dies that you have. I must admit that if I was to do this card again I would use a more decorative edged die to give more interest to the focal point.

I layer the larger patterned paper rectangle onto the short flap that we created and glued it with Art Glitter Glue. I then took the same sized white rectangle, lined it exactly up with the rectangle on the front and glued it down to the inside of the card to create a space to write in. You will only need to do this if your card base is coloured and you need a place to be able to write your sentiment.

Next, I glued the smaller white rectangle onto of the patterned rectangle. Like I said before, I had wished I used a die with a decorative edge, but that is okay, I added my own faux stitched element with a black marker. I then adhered the gnome in the centre with some foam tape to add some dimension.

For the sentiment, I chose to use “Merry Christmas From our Gnome to Yours” and stamped it on the inside white rectangle using Versafine Claire Nocturne Ink. I like the idea of adding some of the extra stamp elements like the border or the star ornament. However, I did not have room on this card for that.

That is it for this quick and simple Gnomes for the Holiday card! You of course can add sequins or embellish to your hearts delight, however, I decided to keep mine fairly simple this time.

Next up on the blog is Kai!

Here is a full list of our blog participants with links:

Tara
Deborah
Jessica
Chala – You are Here!
Kia
Lindsey
Susan

Thanks for joining us and stay crafty!
For the Birds! – Scrap’n Stamp Blog Hop

Hello! It’s that time again! Blog Hop time! This month our theme is “For the birds!” As always, as you hop along with the participants make sure to leave a comment for your chance to win a $50 Scrap’N Stamp Gift Certificate! I wonder if Pip will make an appearance? There will also be 20% off select bird themed items. Be sure to check out all the sales by clicking HERE!

September is such a beautiful time of the year! I love that it is the start of our normal routine (including back to school!) at my house and just the other day I started to hear the geese starting to fly south. Also, my dear friend the woodpecker has finally decided to stop hammering on my metal vent on the house! Lol!

You can watch my craft my cards by clicking HERE: https://youtu.be/g1Rv_wR8SvU

Let’s get started with my first card! I am using the Brutus Monroe Birdhouse Builder die set along with Tim Holtz Holiday Greens mini dies. I die cut all the pieces from coloured cardstock using my Gemini Jr. For the birdhouse I added a barnwood stamp to add the look of texture to the die cut. For the foliage pieces I added dimension by inking up the edges with Distress ink in Barn Door, Peeled Paint and Forest Moss.

I die cut a piece of white and red cardstock from the MFT rectangle stax dies and adhered it down onto an A2 sized card base. I then arranged the foliage die cut pieces in a semicircle along the bottom and tucked the birdhouse down in behind. I then added the cute little bird to the top of the house. To secure the die cuts to the cardbase I used Art Glitter Glue.

For the sentiment I used the Simon Says Stamp Tiny Words Christmas stamp and heat embossed on black cardstock with white embossing powder.

I love the finished look of this card and am ready to mass make these style for Christmas!

For my second card I was eagerly awaiting a new order from Scrap’N Stamp! It arrived in time for me to use the A Little Birdie Told Me stamps by Photo Play. I just love the quality of their stamps!

I stamped the images of the one bird and some branches with Memento Tuxedo Black ink and Copic coloured the images. I again used the Brutus Monroe Birdhouse Die set to cut out the birdhouse.

I used a blue circle embossed cardbase that I had in my stash. I then ink blended some clouds onto white cardstock using the MFT Clouds stencil and Speckled Egg Distress Ink. I like to use my Waffle Flower Mini Media Mat to do my ink blending on as it helps keep my cardstock in place and my work surface clean! I then die cut the piece of white cardstock with the MFT Wonky rectangle stitch dies.

I adhered the birdhouse to the upper two thirds of the card and arranged the branched in front for the little bird to stand on.

The sentiments included in the set are so cute and this was was just perfect because while I was making this card we had some new neighbours move in down the street! I can’t waiting to give them this card!

I hope this hop has inspired you to pull out your feathered friends stamps and get creative!

Next up on the hop is the talented Deborah

If you missed any of the participants you can catch the full list below

Tara
Susan
Kia
Chala – You are Here!
Deborah
Lindsey
Jessica

Have a great long weekend!

Slimsational Blog Hop with Scrap’N Stamp

I am so excited for today’s Blog Hop, it’s going to be Slimsational! The amazing Slimline Die Cut System from Picket Fence Studios made making these cards so easy that I was able to create 5 cards for you today!

We have a lot to get through so let’s get started!

All of today’s cards use the Slimline Die System from Picket Fence Studios with the slimline card bases measuring 8 1/2″ x 7 ” with the score line at 3 1/2″ and a bunch of copic coloured pieces that I had previously fussy cut and coloured ahead of time.

For my first two cards I will be using the Saddle Up & Celebrate stamp set from My Favorite Things. I used the smaller rectangle slimline die to create two panels that I will be ink blending one. The first panel I ink blended the Clouds Stencil from MFT with Distress Oxides in Salty Ocean, Faded Jeans and Squeezed Lemonade for a pop of brightness.

The second panel I was able to easily create a beautiful farm scene with the Picket Fence circle die, the square outside stitch die and the grassy circle die that came with the die cut system. I then ink blended the top portion in Broken China and the bottom in Lucky Clover. I did die cut a second picket fence piece and fussy cut it out and glued it on top to add dimension and to hide any of my ink blending that got on the fence portion.

I adhered the inked cloud panel onto the card base and then adhered the die cut scene onto of that with A LOT of foam squares so as not to get a saggy panel. I then adhered by characters onto the scene with some liquid adhesive. I recommend Gina K Connect glue or Hero Arts Precision glue as they are both strong adhesives.

For the sentiment I used the Lawn Fawn Bannertastic dies and heat embossed with Wow super fine white embossing powder.

I stepped up my card game by creating an ink blended cloud envelope to send the card in.

The second card uses the same techniques and stamp set but I oriented the card vertically and only used one of the die cut elements from the slimline die cutting system. Again, I stepped up my game with a matching envelope using the Xyron sticker maker and some of the pre-coloured elements to adhere to the envelope.

It was a magical moment for the third card as I used Lawn Fawn Fairy Friends and created a slimline window card with the birch tree square die to reveal the beautiful scene that I created for the inside of the card. I sometimes feel like I neglect the inside of my cards so I wanted not only to have my greeting, but fun images to go with it.

I used a yellow coloured pencil and some Clear Wink of Stella to add magic and sparkle to the lanterns as well as to the fairy wings.

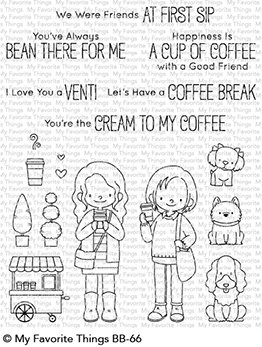
My fourth card uses another favourite stamp set from MFT – Friends at First Sip. This time I only used the smaller rectangle die and some polka dot patterned paper. I then pulled out some of my own dies that I had on hand. I used an oval die and a stitched square die that I adhered onto the card base in the diamond position. For the sentiment inside I stamped the Picket Fence A Paper Hug stamp with Versafine Clair Nocturne Ink.

My fifth and last card I got even more crazy and decided to create an interactive card with the MFT Falling from the Clouds die set…but in my own way. I only used the notched die cut from the set as I have to extend the scene much taller and more narrow than the standard die frame allows.

I mask off the left side of my card base and ink blend the background with Faded Jeans Distress Oxide ink and my foam blending tool. I like to use the foam blending tool when I want to lay down a lot of ink and then I use my Picket Fence Blending Brushes when I want to blend two colours together (or for softer ink blending).

I pulled out a stitched cloud die from my stash and die cut a piece that would hide the upper notched element and I used the MFT Slimline Grassy Hills borders and Stitched Hillside Borders die cut from green cardstock to hide the lower element.

Before I start assembling and adhering things, I need to make sure I stamp my sentiment on the cloud panel. I used my stamp perfect and Versafine Clair Nocturne Ink. I also added some interest to the background by stamping a few raindrops with Versafine Watermark ink and clear heat embossed them. (You may also want to adhere any elements/characters at this point. I did it at the end but would recommend to do it at this point)

Our next step is to pull out some invisible thread and patience! Yikes are my eyes getting old! I also pulled out my long forgotten seed beads to thread on. It might be easier to watch the video to see how I adhered the thread and beads onto the notched pieces. It actually isn’t that hard. You just need to remember to inset them from the edges of your card a bit with some foam tape and ensure that you have the notches (or teeth) so that they face out. Also, keep your thread on the shorter side so as not to get it tangled when you are working!

After I strung the beads I added more foam tape onto of the notched element and adhered the covering elements (clouds and grass) over top. I then carefully added my little critters from the Lawn Fawn Butterfly Kisses stamp set underneath the thread (See above where I recommend to do it earlier!).

Again, I paired it with a matching envelope by creating some stickers with my Xyron sticker maker and some of the extra element pieces from the stamp set.

Whewf! That was a lot of cards – but it went by so quickly and easily! I could have kept going….and think once I get this post done I will go back to create some more as I still have some pre-coloured and cut elements left over!

I would like to know which one was your favourite! Vote here!

I want to thank you for hopping by! Remember to leave a comment on my blog and over at my YouTube video for your chance to WIN your very own Picket Fence Slimline Die Cutting System set!

https://www.scrapnstamp.ca/store/pc/shownewarrivals.asp?idaffiliate=24

To help celebrate the New Year, Scrap’N Stamp is also offering 21% off your order! All you have to do is enter this coupon code at checkout: “finally2021” Click HERE to start shopping!

I am looking forward to seeing your Slimsational Slimline creations! Share them over at the Scrap’N Stamp Facebook Challenge Page for even more chances to win!

Next up on the blog is SUSAN!

If you missed any of the previous Design Team posts you can click on the names below to check out their Slimsational Cards!

Tara/SNS
Nancy
Deborah
Kia
Chala – You are Here
Susan

Happy New Year and Stamp Safe!

Crafting Through the Chaos of Life!

Handmade Digital Greetings

Digital Greetings

Hey guys! It’s Chala here for today’s Random Acts of Cardness word “Greetings”!

It looks like we will all be celebrating Christmas a lot differently than we all wanted to. So, I decided to take today’s challenge word and bring my handmade card to life with a digital greeting. This is a unique way to send a special video greeting to my loved ones far away.

It is a really simple process actually. All you need is a smart phone and/or a computer. I incorporated my Silhouette die cut machine, but you don’t need one to create this type of card.

I started out by searching for a *free* program that could convert a video into a QR code link. The best one I could find was a site called Mevie. It allowed me to upload a video I took with my iPhone. All you need to do is register for free, which I recommend. As a registered user you can store your videos indefinitely. Otherwise, your videos would only be available for 30 days.

The process to upload and create the code was very quick and easy, even with my old and slow Mac! Watch the video below to see how I created it.

After the QR code is created and saved you can then print it out and add it either to the front, inside or back of your card. Just make sure you let the recipient know there is a little something extra for them by scanning the code with their phone camera.

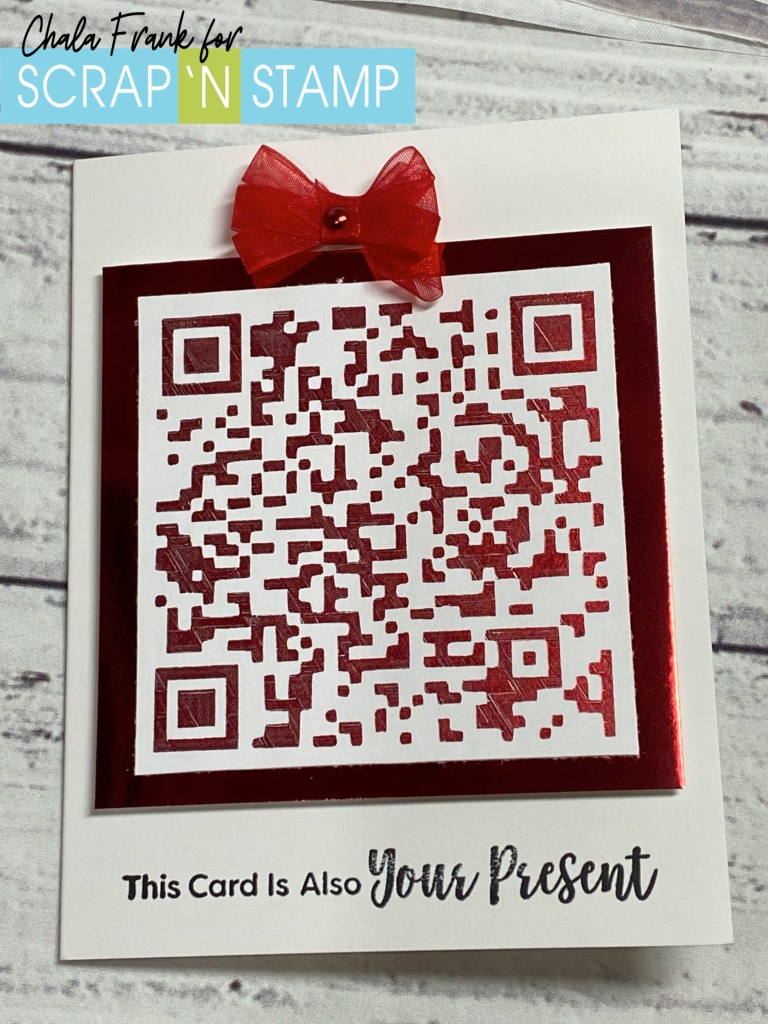
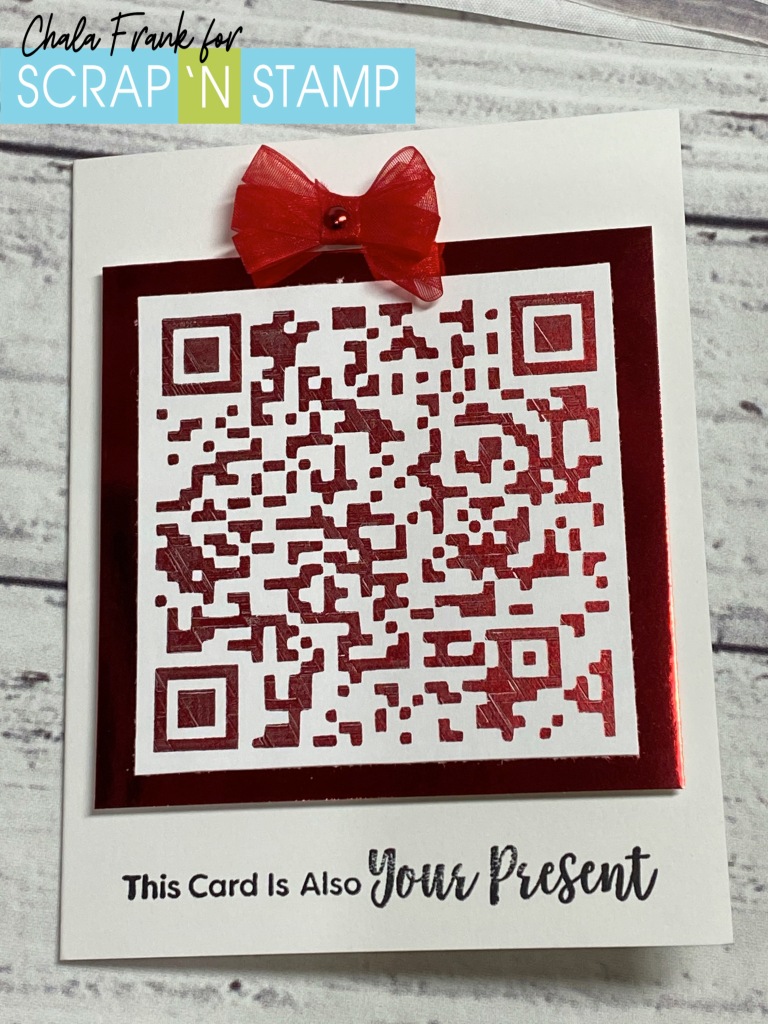
I made my code the main event of my card and wanted to make it look like it was the wrapping paper of a present. To step it up a bit, I pulled out my We R Memory Keepers All in one Foil Quill. The best part is as of the date of this posting it is part of the Black Frid’eh 50% off Sale over at Scrap’N Stamp! I won’t go into all the details of how I did the foiling as I have shown how this product works before and you can check out that video by clicking HERE. Basically, I imported the image, traced it and then instead of “cutting” I sketched the image with the Foil Quill using some Gemini Paper Craft Berry Foil and the cross hatch sketch feature ensuring that I decrease the spacing between the hatching to create a more solid sketched image.

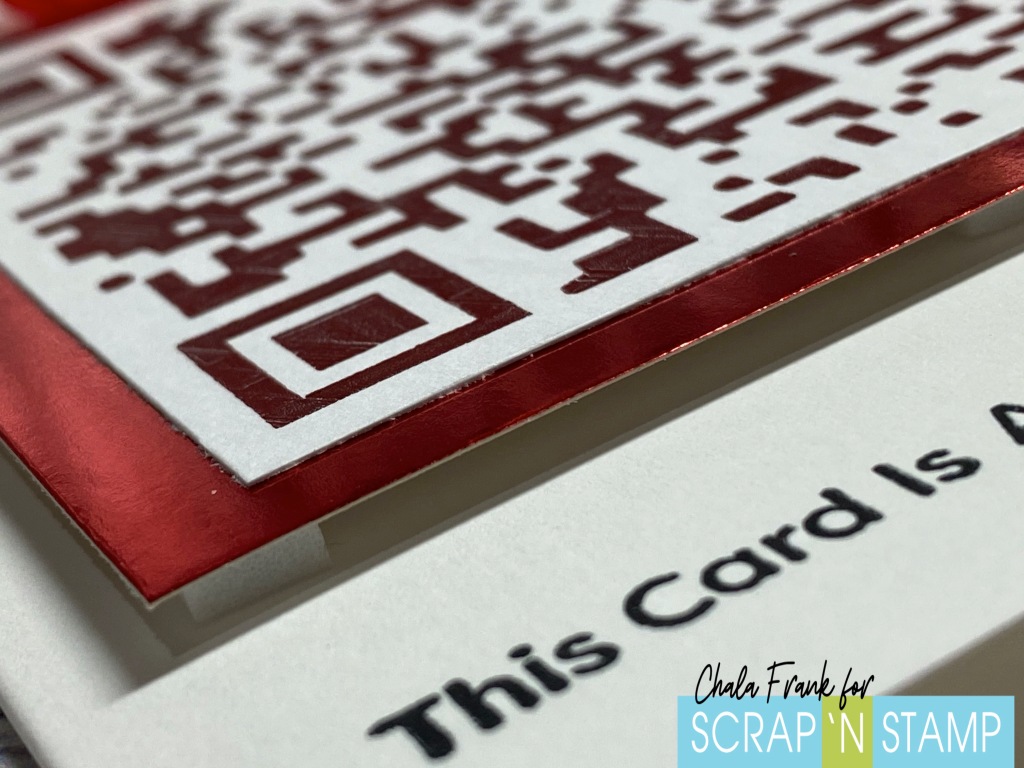
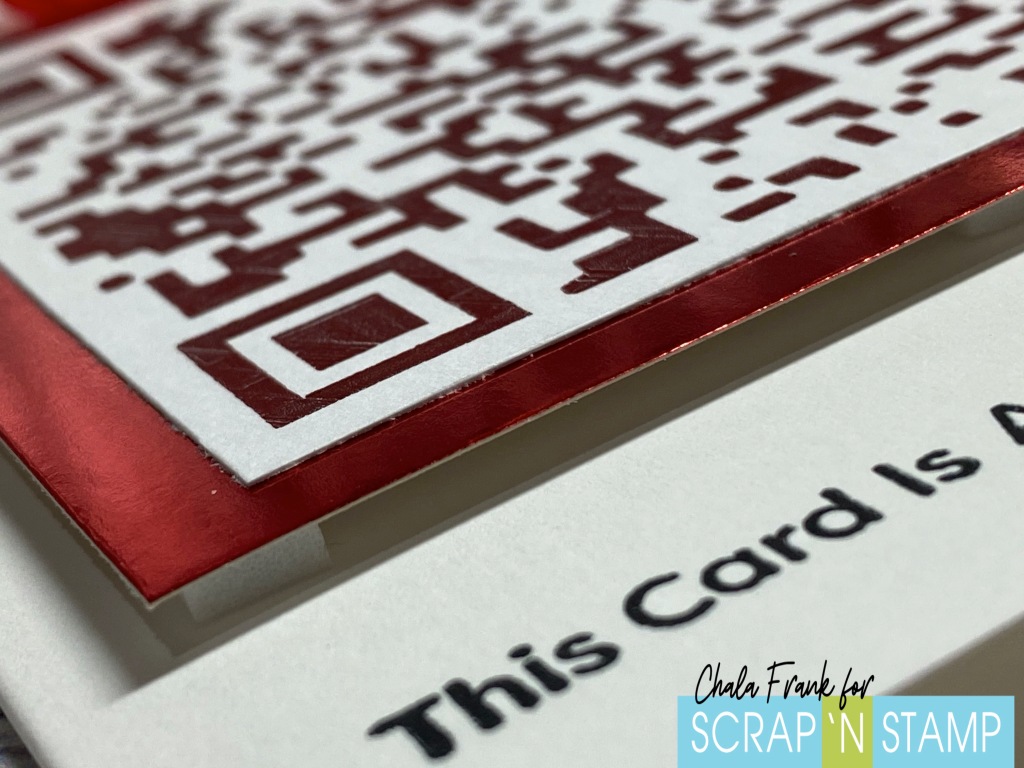
I was a little worried about whether the QR code would work with the foiling or if the shine of it would cause issues. Luckily, it worked perfectly!! I then trimmed out the QR Code into a square for my “present”. I adhered it onto a standard A2 size folding card with some foam squares and created a ribbon bow and secured it with a brad. One very important thing to remember is to adhere the QR code the correct way up! Surprising, I got it right the first time (trust me, no one was more shocked than me! lol!). I then trimmed out the code and layered it onto a piece of red foil cardstock from the American Crafts 6×6 Holiday paper pack.

I kept the sentiment super fun and simple using the My Favorite Things Sassy Pants Holiday Too sentiment “The Card is Your Present” with VersaFine Claire Nocturne Ink in Nocturne. I thought this one was perfect! I then left the inside blank so that I could write to the recipient as well as to let them know to scan the present for a special “gift”.

I know that this card may seem really simple to look at, but if you have loved ones who would enjoy receiving a video greeting, it will be an incredibly special keepsake and something they will want to show others!

Remember, you don’t have to make it into a present, you can create your regular cards and simply print, cut out the code and adhere it on the inside or back of your card.

Digital Greetings
Digital Greetings
Digital Greetings

I thank you for so much for stopping by today and I hope this has given you a way to send a special greeting to those you can’t be with.

Crafting Through the Chaos of Life!

Live, Love, Lavinia – Scrap’N Stamp Blog Hop

Stamptember is here and this month at Scrap’N stamp it is Live, Love, Lavinia Stamps! You can grab Lavinia products at 20% off until 9:00 pm. PST on Sunday, September 6, 2020. Click HERE for all the Hot Deals! There are also 3 prize packs to be won so be sure to hit up each Design Team Members Blog and Social Media spots. Like, Share, Comment and Subscribe to increase your chances of winning!

I adore the whimsical images and feelings that Lavinia products conjure! With the Hub-Bub of getting three kids ready for back to school and dealing with the anxieties of both the kids and myself, I am ready to create something the takes me away to a magical place….

With that said…something strange happened during my crafting process…I found that my anxiety and emotions ended up creeping into my art and the card I created is much darker than what I had originally planned to create with these Lavinia stamps. I also was only able to mentally create one card and felt completely exhausted when I was done. At first I was really worried, but then I realized not all creations need to be bright and sunny, sometimes we need to let our creative time also be therapy! Which, funny enough is one of my sayings….”Crafting is my Therapy”. What I want you all to know is that creative slumps are okay! You are not always going to be in love with the outcome of your creations or sometimes you start with one creative plan and it goes on a completely different tangent…much like me writing this blog! LOL! Thanks so much for listening to my ramblings! Let’s get back to the card!

I began the process with a piece of patterned paper that I have literally had for YEARS!! I honestly cannot remember where it even came from…I also picked two stamps sets from Lavinia: Dandelions and Fairy Words. I liked the floral pattern on the paper but thought it was too bright and I wanted to mute the colours a bit with some Distress Ink. I started out ink blending around the edges with my Picket Fence Blending Brushes in Antique Linen, and then I unintentionally kept gradually getting darker with the inks moving through Tea Dye, Vintage Photo, Walnut Stain and finally Ground Espresso.

Once finished I panicked! Oh my, that completely transformed the original patterned paper. But, I liked how the ink darkened certain areas and gave a completely different look and texture to the flowers pattern. I liked the look even more when I used my Hampton Arts Stamp Perfect to centre the Fairy Words stamp on the inked panel and stamped it with VersaFine Clair Ink in Morning Mist. The words popped just enough to look like a page of an old book.

I knew I then wanted to layer the Dandelion stamps on top but it was a toss up of whether to use the VersaFine Clair Ink in Nocturne or do some heat embossing….Gold heat embossing won. I hit the panel with my heat gun and treated the panel with LOTS of antistatic powder to ensure all the ink that I blended and the stamped sentiment was good and dry. I then used Versamark Ink and Wow Metallic Super Fine Gold Embossing powder. I added a few extra gold dots with a gel pen closer to the top of the card just to give it a bit more shine.

I felt it needed just a wee bit more texture so I used the MFT Wonky stitch die and then adhered the panel onto an A2 side folding cream colour card base.

It may not be the brightest or prettiest…but, it was what my soul needed to create at the time.

I am hoping that I will be able to spend some time during this long weekend to play around with the other Lavina stamps that I have (and even order a few more with the great sale that is going on!) and will share what I make on my Facebook Page and Instagram.

You can check out all the Blog Hop participants’ creations by clicking on the links below.

Tara/SNS blog
Nancy
Laurie
Deborah
Kia
Chala – YOU ARE HERE
Susan

Remember there are 30 days of inspiration on the Scrap’N Stamp Facebook Challenge Page and sharing your creations can also earn you a $50 Scrap’N Stamp Gift Certificate!

Have a great long weekend everyone and I hope you take some time to be creative!

~Chala

Simple Sentiments

Hello Everyone!

I am a bit behind in sharing some of my videos to my personal blog! Yikes! So here is a look at a post I did a couple of months ago for Scrap’N Stamp. Hope you enjoy!

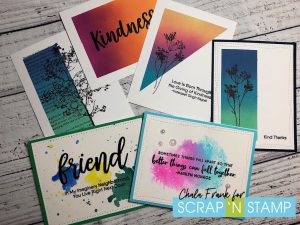
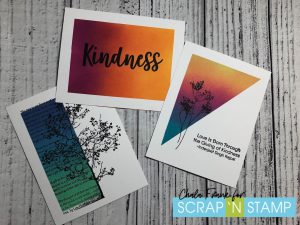
Today’s cards are the product of me playing around in the craft room and creating cards with simple sentiments and colourful backgrounds.

I find that with so many exciting new products on the marked we can sometimes forget about the products we have already purchase and are sitting in our craft rooms.  I’m not going to lie, I want to buy all the things too….but, sometimes you have to resist!  So, I challenged myself to go back to the basics and create some simple, fast and func cards.

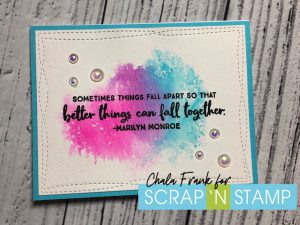
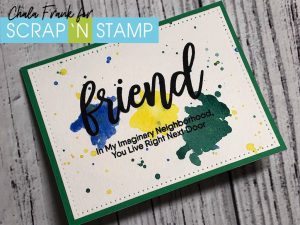
I started off  creating some watercolour splash backgrounds.

To do this, I colour the Zig Real Brush Markers onto some acetate, spray with water and “smush” onto some watercolour paper.  It’s a simple technique with some great results.  The only thing you need to be careful with is with what colours you lay next to each other so that they do not become “muddy”.

I also pulled out my watercolour pan and played with wet on wet technique and dropping colours to create the “splash” look.

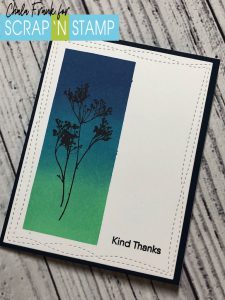
While those were drying I moved on to creating some backgrounds using Distress Oxide Inks.  The colours I chose to use are Wild HoneySpiced MarmaladeSeedless PreservesCracked PistachioBroken ChinaFaded JeansSqueezed LemonadePicked Raspberry and Peacock Feathers

I taped of different shapes using some Purple Thermo Web Tape as well as some wider painters tape that I had on hand.  Just remember to be very careful when pulling up the painters tape as I did have some ripping.

I wanted to keep the sentiment simple.  I pulled out some of my favourite MFT sentiment stamps sets: Hello BeautifulAnything but Basic Friendship, Kind Words (Retired)All Smiles and Anything but Basic Encouragement.  These sentiment sets are so versatile.

I also pulled a view image stamps from an older Tim Holtz Stamp /Stamper’s Anonymous Set called Fancy Flight as well as a Cling stamp from Stampendous called Cling Tree Poem.  The silhouette of the images on the colourful backgrounds is so simple, but pretty and I got a great crisp image by using the VersaClaire Nocturne Ink.

Check out the video here to see the techniques.

 I hope you enjoyed today’s cards and that you are inspired to use products you have and create fast, fun and simple cards!

~Chala

Materials

Galentines Blog Hop with Scrap’N Stamp

Today’s post is for Scrap’N Stamp’s Galentines Blog Hop. If you are following along you have come from Sandi’s blog and oh my I love her cards!! If you missed the start – No Problem! You can click here to start at the beginning.

I have to tell you, I am so in love with this concept! Valentine’s Day for me is celebrating the idea of love and all of those different types of love that we have for people. The love for our children, our spouses and of course our friends! Now, I must admit, I don’t have a lot of gal pals….but the ones I do have I am so very thankful for. I love that no matter how much time goes by between seeing eachother (and sometimes that can be years….) we always pick up right where we left off…not even missing a beat!

When I think about what I typically do when I get togther with the girls it is usually for wine or coffee. Lately, I have been enjoying cofee more than wine (weird..I know)…so, when I saw this super cute set from My Favorite Things called Friends at First Sip, It was screaming for me to create a scene card! I love all the critters and the two gal pals. There were so many ideas that came to mind! In thinking about how I wanted to create my scene I also knew that I wanted to step out of my “A2 size card comfort zone” and explore making a stepped up version of the Z fold card.

the great thing about these cards is that you can make your Z fold card in any shape or size. For simplicity sake, I thought I would stick with one that could fit in a 6″ x 6″ envelope. You can see the measurements I used in the picture below.

The base will measure 11″ x 5 1/2″. You wil score at the 2 3/4″ mark and the 5 1/2″ mark.

To step this card up I am adding an additional piece/element that wil pop out from the card. Again, you can vary the size of this as long as it is the same length as your card base. If this is your first time making one of these cards I suggest using these measurement f 1 1/2″ x 11″ You will then score similar to the card base……but on the opposite side. I have tried to make this easy to understand by using the same score measurements as we did in our base. You just need to remember if you are using a patterned paper or are adding any sort of shape to the top of this piece that you will want to turn your piece upside down to get the scoring in the correct place. Confused yet? I suggest you watch the corresponding YouTube video below so that this makes a bit more sense….

Now that we have the general idea of measurements I will show you how I made mine. The best way to do that is of course by video. So click below to watch the magic happen.

I hope that you found today’s video tutorial helpful and are inspired to give this stepped up Z fold card a try! You can find the list of materials I used below.

Remember to leave your comments on each blog for your chance to win that $50 Scrap’N Stamp Gift Card! Next up on the blog is the talented Deborah! Again, if you missed any of the blogs for this hop the complete list with links is below! We would also love to see your Galentine cards, remember to post them on the Scrap’N Stamp Facebook Challenge Page.

Blog Hop Participants:

Materials List:

Crafting Through the Chaos of Life

Lawn Fawn – Keep Swimming Reveal Wheel Card

Lawn Fawn / Chibitronics Keep Swimming Reveal Wheel Card

I am creating for Stamp’N Scrap today! Head on over to their blog to see the list of materials used and check out some great deals!

Disclosure:  Please note that some of the links on this site and in my blog posts contain affiliate links and if you go through them to make a purchase I will earn a very small commission at no extra cost to you.  This assists me in purchasing new products to try and share with you in future blogs and videos.  Keep in mind that I link these companies and their products because of their quality and customer service and not because of the commission I receive from your purchases. The decision is yours, and whether or not you decide to buy something is completely up to you. 

 I truly appreciate all the support I receive!

~Chala, xoxoxo

Moody Unicorns – Gerda Steiner

Hey guys! I am back to share a stamp set that I am absolutely in love with! The Moody Unicorns stamp set from Gerda Steiner is SO much fun to colour and is perfect for any unicorn lover! I just had to use all three images to create this custom trifold card!

I start this card out by using an A2 size white cardstock panel. I will be using Distress Inks in the colours Spun Sugar, Shabby Shutters, Shaded Lilac and Tumbled Glass to create these whimsical clouds with the Clouds Stencil from My Favorite Things. I am also using the Life Changing Blending Brushes from Picket Fence as I want a light and smooth colour blend.

I am also using another really cool tool to keep my cardstock in place while I am blending. It is the Wendy Vecchi Make Art Stay-tion and this tool is fabulous when you are trying to keep your paper from straying across your desk! I love that it comes with 4 heavy duty round magnets as well as this magnetic ruler with the “centre 0” to help you easily find the centre of your cardstock piece!

Once I have all the ink blended cloudes done I will set that piece aside so the ink can set up a bit. I will move on to die cutting and ink blending the trifold card pieces.

I am taking one of my A2 card panels and having it so the card opens up backwards. I will then use the Meadow Border from Lawn Fawn, however you could also use the Grassy Hillside Border and partial die cut the border onto the left side panel of the card base using Removable Purple Thermo-Web tape to secure the die to the cardstock and then will run it through my Gemini Jr.

Now….I probably should have done my ink blending first…..but, I will remember that for the other side! I will then use this piece to gage where I want to cut the other grassy hill on the other A2 Card base (the one that opens like a card usually does). But before I die cut…..I will do my ink blending! The colours for the grass are Pine Needles and Mowed Lawn. I did get a bit of ink transfer from my finger to my cardstock and I just used my Tombow Mono Sand Eraser and it works like a charm to remove that ink.

I also need to make sure I leave enough room on the bottom for my stamped sentiment. Using my Fiskars Sure Cut Trimmer I will cut off the portion of the card that is not ink blended, this will form one of the trifold portions of the card.

I will go ahead and ink blend on the first portion that we die cut and use the trimmer again to cut off the top portion that we don’t need.

Once both card bases have been inked up and blended I am going to take the card that opens up backwards and adhere our stenciled cloud piece onto the left side of the card and then trim a VERY tiny bit from the left side of the card so that when I lay them together the cards can fold over eachother easily. This might be a bit hard to understand so I encourage you to watch my YouTube video to see how that comes together. I will then adhere the two pieces together using my tape runner.

Now we have the trifold portion of our card complete and we can close up the “flaps” making sure the taller one is closed first so that the smaller grass portion lays on top.

I will set this card base aside and work on my cute little Moody Unicorns. I pull out my stamp perfect and using Memento Tuxedo Black  ink I will stamp these unicorns onto some Crafter’s Companion Ultra Smooth White Cardstock as I will be Copic colouring. The colours I am using are C0, C1, C8, YG01, YG03, YR02, B01, BV00, RV02, W0 and W1. I will link here to a great Copic set if you are just starting out. This set has a great variety of colours for you to start with and once you decide the shades and colour families you like you can add individual makers to fill in your set.

Once these cute unicorns are all coloured in I will fussy cut them out. However, you can get the coordinating dies by clicking here. Now it is time to stamp our sentiments onto the folding grass pieces. Again, I am using sentiments that come with the Moody Unicorn stamp set. I will stamp the sentiments using my favourite ink for sentiments, the VersaClair Nocturne Ink. If you want to emboss your sentiment, make sure I use an embossing powder tool!

I will stamp the “Seriously” sentiment on the front flap. The second flap is stamped with the sentiment “Did you think I would forget?” and then for the inside I went with a big and bold “Happy Birthday” from the Hero Arts – Snarky Mix & Match Sentiment stamp set.

I will then adhere my cute little unicorns to the card, and for a final touch I will add Clear Wink of Stella to the bold Happy Birthday sentiment as well as the hair on the unicorns.

Here is a look at each of the finished parts of the tri fold card.

Thank you so much for spending time with me today! Remember to check out the YouTube video for this card! I appreciate all your comments, likes and remember to subscribe so you don’t miss a crafty thing!

Disclosure:  Please note that some of the links on this site and in my blog posts contain affiliate links and if you go through them to make a purchase I will earn a very small commission at no extra cost to you.  This assists me in purchasing new products to try and share with you in future blogs and videos.  Keep in mind that I link these companies and their products because of their quality and customer service and not because of the commission I receive from your purchases. The decision is yours, and whether or not you decide to buy something is completely up to you. 

 I truly appreciate all the support I receive!

~Chala, xoxoxo

Warm & Feathered Hugs – Freezin’ Season

Hello Again! I am back over that the Scrap’N Stamp Blog today sharing another cute card for the Christmas in July Challenge. Remember to head on over to that challenge page to share your Christmas in July cards for a chance to win a $50 Scrap’N Stamp Gift Certificate. You’ve got until July 31st to post and make sure to hashtag it for another chance to win #SNSChristmasinJuly. Winner chosen by random draw. *One entry per day.

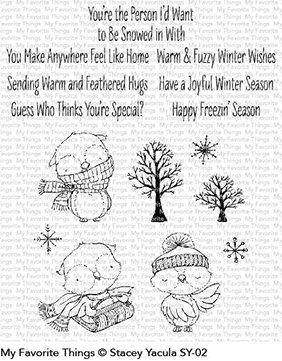
The stamp set I am working with today is from My Favorite Things and is called Warm & Feathered Hugs. I love everything about this set. It is perfect for Christmas and Winter themed cards…which is nice, because I have friends who don’t celebrate Christmas, but I still like to send them a card!

I am really happy with the way this card turned out! For the list of all the supplies I used head on over to the Scrap’N Stamp Blog post and don’t forget to check out my video on YouTube! (I even made a fun new intro just for this challenge!)

Thanks so much for stopping by and have a fantastic day!

~Chala, xoxoxo

Disclosure:  Please note that some of the links on this site and in my blog posts contain affiliate links and if you go through them to make a purchase I will earn a very small commission at no extra cost to you.  This assists me in purchasing new products to try and share with you in future blogs and videos.  Keep in mind that I link these companies and their products because of their quality and customer service and not because of the commission I receive from your purchases. The decision is yours and whether or not you decide to buy something is completely up to you. 

 I truly appreciate all the support I receive!